Test protocols are groups of tests that are run on a
specimen. Laboratories assign specific codes to their test protocols which are also known as
test panels or test profiles. You must create a SYSTOC test protocol for each panel and link the
task prototype for each substance that is included in the panel.
-
Create a list of the test panels you use for drug
testing.
Be sure to have the lab-specific code for each panel and the name of each drug test
component included in the panel. Most organizations use a single laboratory for drug
tests. If you use multiple laboratories, you will need to add all the panels you use for
each laboratory.
-
Go to .
Press F1 to view detailed information about the Test Protocols screen.
-
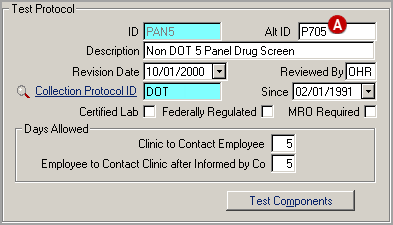
Add a new test protocol using an ID of your choice.
-
Complete the fields on the screen as appropriate.
HL7 Drug Test
Interface for CRL only:

Enter the lab-specific code
in the
Alt ID field. When you
use the CRL-specific non-DOT CCF form and select the Program from the SYSTOC lookup, the
Alt ID and Description are inserted into the Drug Test field. This is included on CRL's
non-DOT CCF strictly for use with CRL's prenotify service for non-DOT tests.
-
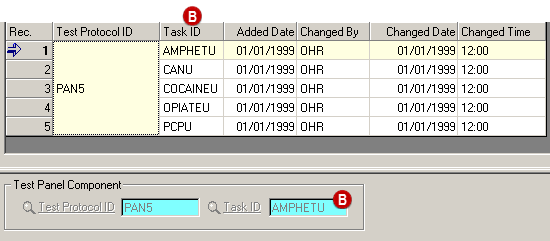
Save the new test protocol and click Test Components.
The Test Components screen opens and the Test Protocol ID is automatically
populated. Use this screen to link the task prototype for each substance that is included
in the test protocol.
-
Search for and select the first Task ID in the protocol, and
save.
HL7 Drug Test Interface: Make sure to select only components with the correct
SYSTOC-defined task IDs.
The first task appears in the grid.
-
Use Ctrl + A or click the new record icon to add another task
ID.
-
Repeat the previous two steps until you have added all the
task IDs
 for the protocol.
-
Repeat the entire process until you have added all your test protocols.