Creating a Recurring Appointment
To initiate the process of scheduling recurring appointments, make the first appointment in the series on the Appointment Register screen, selecting order(s) that are appropriate for the entire series.
Then, click on the Find Appt. in Schedule button to take you to that appointment on the schedule grid. Select the appointment on the grid, right click the mouse, and then choose the Recurring Appt option.
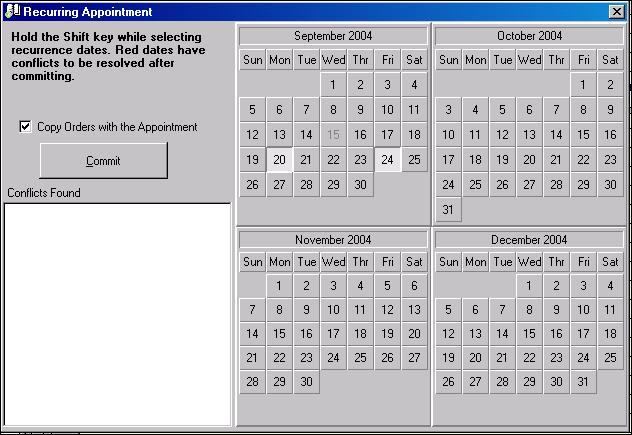
You will see a screen that comprises two major sections. The section on the right contains monthly calendars for a four month period, beginning with the month of the original appointment. The original appointment date is disabled by the program. This is illustrated in the above image, where we know that the original appointment is scheduled for the 15th of September, 2004, because that date is gray instead of black. The left side of the screen primarily consists of a box labeled Conflicts Found, a Commit button, and a checkbox that gives you the option to copy the orders to each of the recurring appointments.
To schedule the appointments, hold the Shift key down and use your mouse to select the desired dates. As you pick a date, the background of the square containing that date will become lighter. In the above image, the selected dates are the ones with a white and gray background instead of the solid gray for the unselected dates. You may choose as many dates as you need. If you choose a date you don't want, undo the selection by clicking again (with Shift still held down).
Once you have successfully selected the dates, click on the Commit button to add the appointments simultaneously. The program will then return you to the schedule grid with the calendar date of the original appointment.