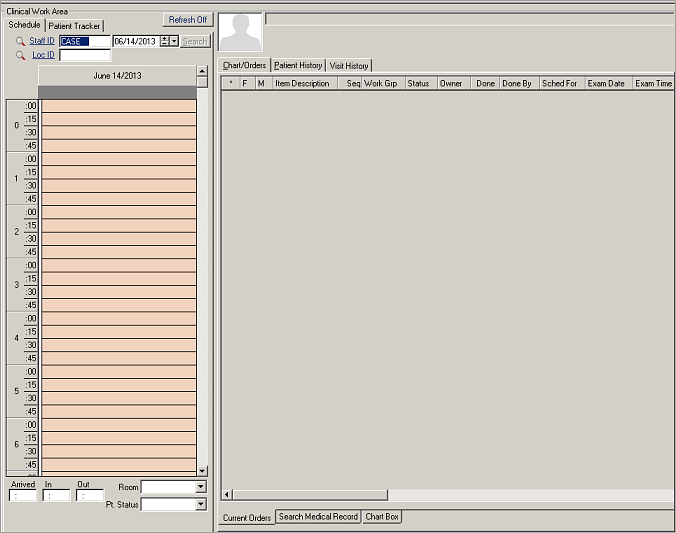
Clinical Work Area
Streamlines data access for medical professionals who use computers during patient visits. Virtually anything that a clinician might do in SYSTOC can be done from this screen. Access this section by clicking on the Clinical Work Area option at the top of the main menu.
|
The CWA screen displays appointment information in the left frame, while
patient information is available on the right. Each of these areas is
subdivided into tabbed sections.
The appointment tabs give clinicians more control over their schedules. They can keep track of their own appointments and monitor the availability of co-workers. They can determine which patients are currently in the clinic and learn their status and location. They can tell when a patient has completed an appointment and left the clinic. And, if desired, they can even schedule future appointments. Tabs on the right side of the screen contain information used in support of the patient visit. Each of these tabs is designed to meet a specific need. If needed information is not readily visible, a search function helps locate it. Some types of information not normally stored within SYSTOC can be accessed from the Clinical Work Area if it is in digital format and attached to an order. Each order represents work that must be accomplished on behalf of the patient. Responsibility for that work can be assigned on a task by task basis, or formal work flows can be developed that automatically indicate the standard sequence for completing a task. Preparation is crucial to the successful use of the Clinical Work Area. Depending on how extensively your clinic plans to use the capabilities of this section, it may be necessary to devote considerable attention to the setup of tasks, procedures and appointments so these elements function smoothly. To open the CWA section automatically each time you start SYSTOC, go to and set the Startup Component Name to frmClinicalWork. |
|
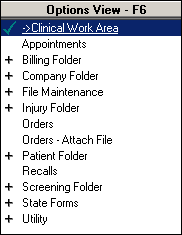
The main Options View menu that normally appears on the left side of the screen is hidden on the CWA until you click on the Split button or press Ctrl+T. If you leave the Clinical Work Area after actuating the Options View it will be hidden again when you return. To hide the Options View without leaving the screen press the Split button again, press Ctrl+T, or use the mouse to grab the right edge of that frame and slide it to the left until that frame is completely hidden.
The image below illustrates the entire CWA screen in the default view. Each of the two major sections of the screen – the Appointments tabs (left side) and the Patient Information tabs (right side) – is discussed in a separate section of this documentation.